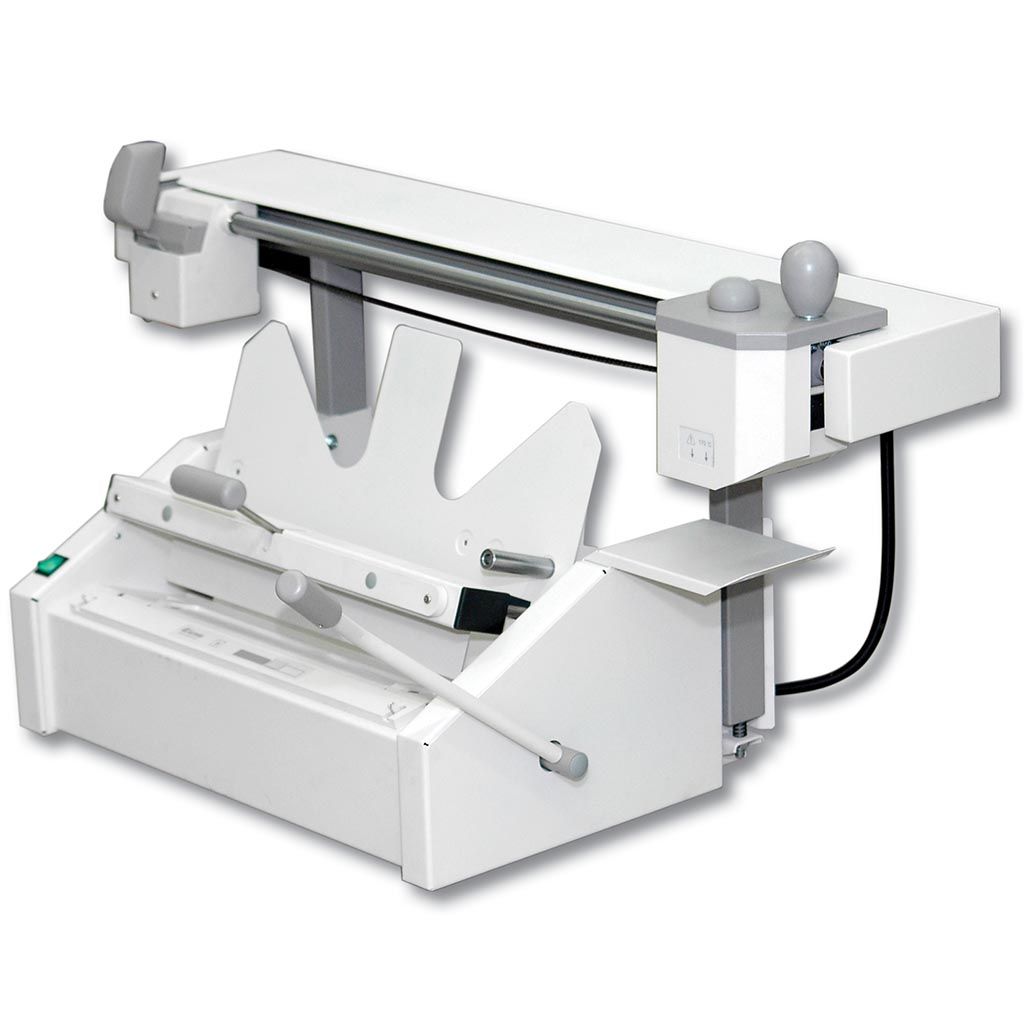
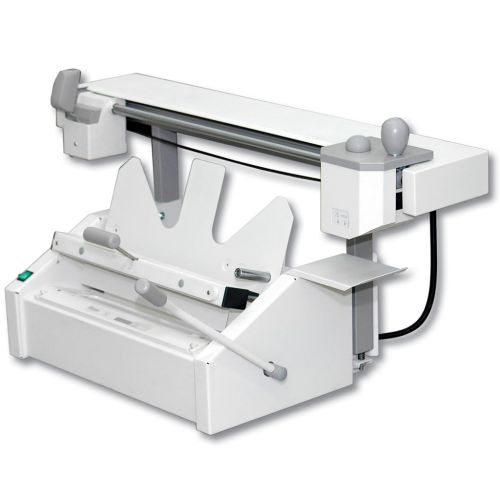
Fastbind Elite XT Perfect Binder 1 /Each
- Binding of larger and thicker books with cover sizes up to 17.9" x 12.6".
- Binding books up to 1.97" thick, which amounts to approximately 500 sheets
- Features a unique PGO rougher.
- Speed: Up to 450 Cycles / Hour [180 Books / Hour]
- 1 Year Manufacturer Warranty


Description
Perfect for print shops, legal offices, photo studios, and more, the Fastbind Elite XT is an all-in-one hot glue binding machine that can quickly and easily bind hard cover books, soft cover books (also called perfect bound books), tape bound books (also called strip bound), and even make tear-off pads of paper. It is incredibly easy to use, with simple step-by-step instructions listed below for each binding type. We also have various how-to instructional videos listed below to walk you through the process. You can use them for school yearbooks, presentation documents, financial reports, photo books, personalized notepads, and so much more!
How to Bind Hard Cover Books:
What You Need:
• Fastbind Elite XT Machine
• Fastbind Elite XT Hard Cover Tool Kit
• Your Pre-Made Hard Cover (Case)
• Your Pre-Printed Book Block (Inner Pages)
• Fastbind End Sheets
• EVA Glue
Instructions:
① Put your EVA glue granules into the glue tank on the right of the machine, and turn it on. Allow about 7-10 minutes for complete melting, depending on how full your tank is. If you have not already, attach your end sheets to your book block while you wait.
② Put your pre-made hard cover (case) into the turning station. The inside of your cover should be facing up. The front cover and spine should be on the bottom of the station, with the back cover pointing to the ceiling. Lift up the spring loaded peg (a part of the hard cover tool kit; sold separately) and slide your cover underneath.
③ Put your book block into the cover and press it up against the peg (do not lift the peg). This centers your book block in the cover so you don't have to do it visually. Press the clamping bar (handle in the middle) against the stack; then lift the handle to lock it in place.
④ Use the turning station handle (on the right) to flip the station (and your book) backward, into the machine. This exposes the spine to-be-bound, facing it toward the ceiling.
⑤ Pull the PGO rougher (on the left) across your book spine, and back. This adds texture to the spine to allow the glue to penetrate your pages and create a strong bind. If you are using thick or coated paper stock, repeat this step a couple of times to penetrate even better.
⑥ Pull the gluer (on the right) across your book spine, and back. One pass is usually enough, but you can repeat this step if more glue is desired.
⑦ Lift the portion of your cover (case) that is facing you, and press it against the book block a few times to position the adhesive. Then wrap it over the book block.
⑧ Pull the turning station handle (on the right) back toward you and release the clamping bar (middle) by pulling it down and out. Pull the book out from under the peg and remove the book through the bottom of the turning station.
⑨ Place your book (spine down) into the nipping station (a part of the hard cover tool kit; sold separately), then press and hold the turning bar handle (on the right) all the way down to nip the spine. Nipping finishes the bind and crimps the spine for a professional finish. Flip your book over and repeat this step to the other side.
⑩ Remove your book and lay it flat to peel the end sheet liner, closing the cover over the exposed adhesive. Flip the book and repeat for the other end sheet.
How to Bind Soft Cover Books:
What You Need:
• Fastbind Elite XT Machine
• Your Pre-Made Wrap-Around Soft Cover
• Your Pre-Printed Book Block Pages
• EVA Glue
Instructions:
① Place your Fastbind EVA glue into machine and turn it on to melt the glue for binding.
② Now place your pre-made soft cover into the turning station. Your back cover and spine should be on the bottom.
③ Place your book block into the cover and press the clamping bar against the stack, lifting the handle to lock it.
④ Turn the station back by lifting the handle on the right, exposing the spine to you. Crease the edge.
⑤ Pull the "rougher" on the left to micro-slit the spine of the book. This roughening process opens up your stock so that the glue is able to penetrate into each page properly for a strong bind. If you are using especially thick or coated papers, then you can repeat this step a couple of times.
⑥ Pull the "gluer" on the right to apply glue to your spine. One trip to the opposite side and back is usually enough, but you can repeat this step if more glue is desired.
⑦ Lift your cover and press it against the book block a few times to position the adhesive. Wrap your front cover over the book block spine.
⑧ Pull the handle back down, rotating the station back to its original position, and push the handle all the way down, holding it firmly. This step presses your book block into the spine of the cover.
⑨ Release the handle and clamping bar to remove your book from the bottom of the station.
How to Bind Tape-Bound Books:
What You Need:
• Fastbind Elite Machine
• Fastbind Lay-Flat Binding Strips
• Pre-Printed Book Block (Inner Pages)
• Scrap Paper
• EVA Glue
Instructions:
① Turn on the Elite XT and fill up the glue tank with your EVA glue. Allow about 7-10 minutes for it to melt before binding.
② Fold your scrap paper, and place it into the turning station. This will prevent glue from getting onto your machine. Place your tape strip, also folded, on top
③ Put the inner pages on top of the tape, and center it as desired. Then press the clamping bar (center) against the stack and lift the handle to lock it.
④ Rotate the turning station back by lifting the handle (right), facing the spine to the ceiling. Crease along the edge.
⑤ Pull the rougher (left) over your book, and back to create micro-slits into the book stock. This allows the glue to penetrate the pages for a strong bind. If you are using thick or glossy/coated paper stock, repeat this step a couple of times.
⑥ Pull the glue tank on the right over your book, and back, to apply glue to your spine.
⑦ Pull the turning station handle (right) back toward you and press down, firmly.
⑧ Release the handle and remove the clamping bar (center), removing your book and discarding the scrap paper.
⑨ Put your book on a flat surface, lift up the tape to expose the liner, and peel it off, pressing the tape to your cover. Flip and repeat.
How to Make Notepads:
What You Need:
• Fastbind Elite XT Machine
• Wax Paper (from any Grocery Store)
• Your Pre-Printed Book Block Pages
• EVA Glue
Instructions:
① Full up the tank with EVA glue and allow 7-10 minutes of melting time before binding.
② Place a sheet of folded wax paper into the turning station. This will prevent glue from getting onto your machine, so it is best if it is a bit larger than your book itself.
③ Place your book block pages on top of the wax paper, align to the peg, and press in the clamping bar (center) against the block, lifting it to lock it in place.
④ Lift the station handle (right) turn the station back, exposing the spine to you.
⑤ Pull the glue tank (right) over the spine, and back. Repeat to apply a second coat. (Note, the roughing step used on other methods is skipped for notepads)
⑥ Pull the station handle (right) back toward you, and press it down firmly.
⑦ Release the handle and clamping bar (center), removing your book through the bottom of the station.
⑧ Tear off your wax paper.
*May vary depending on paper stock, operator, and other factors.
Specifications
| Item # | 04FAELXT110 |
|---|---|
| Manufacturer | Fastbind |
| Manufacturer Part Number | ELXT110 |
| Speed | Up to 450 Cycles / Hour [180 Books / Hour]* |
| Dimensions | 26" W x 15" D x 17" H |
| Power Voltage | 110-115V, 50-60Hz, 5.5A |
| Sheet Size (Max) | 12" x 17" |
| Cover Size (Max) | 17.9" x 12.6" |
| Cover Thickness (Max)* | 225 Index |
| Binding Thickness (Max) | 1.97" (About 500 Sheets*) |
| Shipping Weight (lbs) | 155 |
| Product Weight (lbs) | 115 |
| Shipping Information | This item ships via Truck (Common Carrier). It is the responsibility of the Consignee (receiver) to remove the product from the truck. If you do not have a loading dock or any other means to lift the freight off the truck and/or you need assistance bringing the product inside of your location please contact us. Click here for full details. |
Videos
Fastbind Elite Making A Tear Off Pad
Fastbind Elite Making A Transparent Soft Cover Book
Fastbind Elite Making A Strip-Back Book
Reviews
Frequent Asked Questions
Submit a New Question