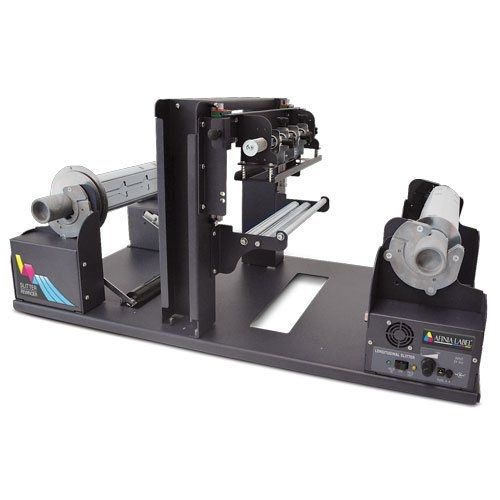
Transform your label printing capabilities with the Afinia Label SR-100 Label Slitter/Rewinder, a game-changer designed to seamlessly complement your Afinia L801 Color Label Printer. Unleash the potential to create vibrant, professional labels ranging from 8.86" to 0.86" in width, catering to applications like lip balm, health and beauty products, eLiquid, and more. The SR-100 operates at a remarkable speed, slitting labels at up to 42.7 ft/min, while accommodating rolls up to 9.84" in diameter with a fixed internal diameter of 3". Revolutionize your label production process by longitudinally slitting full-width, pre-cut label stock, maximizing your printer's output. Print just-in-time for production, make swift design changes from your desktop, and seize control of your label production to boost business profitability. Maximize efficiency and profit by integrating in-house printing, slitting, and application seamlessly with the SR-100 Label Slitter/Rewinder.
Features:
The equipment features a maximum slitting speed of 42.7 feet per minute (13m/min)
Minimum label slitting width of 0.86 inches (22mm)
Core diameter of 3 inches (76mm)
Maximum outside diameter of the label roll at 9.84 inches (250mm)
Specifications
Item #
04AFN25526
Manufacturer
Afinia Label
Manufacturer Item #
25526
Maximum slitting speed
42.7 (13m) feet/min
Minimum label slitting width
0.86" (22mm)
Core diameter
3" (76mm)
Maximum outside diameter of label roll
9.84" (250mm)
Maximum label roll width
8.66" (220mm)
Overall dimensions
16.73" (425mm) W x 28.34" (720mm) D x 14.56" (370mm) H
Weight
55 lbs. (25kg)
Rated voltage
100V – 240VAC, DC Output 24V at 2.5A
Videos
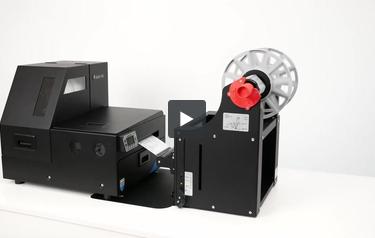
Afinia Label L801 Digital Color Label Printer Demo Video
Transcript:Today we're going to show you how to print your own labels using the L801 Color Label Printer. The L801 comes equipped with a sensor that will detect the leading edge of pre-die cut media like you see here but it can also use continuous and black marked label stock. Black marks are useful for circles and ovals and unique shapes. Here I'm loading the material, we just put the roll inside the printer. It's going to go under a dancer arm and then we're going to feed it into the back of the printer....Read More
Today we're going to show you how to print your own labels using the L801 Color Label Printer. The L801 comes equipped with a sensor that will detect the leading edge of pre-die cut media like you see here but it can also use continuous and black marked label stock. Black marks are useful for circles and ovals and unique shapes. Here I'm loading the material, we just put the roll inside the printer. It's going to go under a dancer arm and then we're going to feed it into the back of the printer. When it sees this roll it'll go ahead and pull it in the rest of the way. I'm just going to move the adjustment guide in and use this plate and this just helps align the label stock and make sure it runs straight through the printer while we're using it. Now common question that I get with the L801 is whether or not it's capable of printing full bleed, meaning edge to edge printing, and you can do this. There are a few settings that we need to adjust to make sure that that happens now. The sample that I'm using today is a two-page PDF so it's going to print a front and a back onto the roll of labels and I want to go into the printer settings. I'm going to check a couple things here. Mainly, I want to look at the page size which is set to 4x6. Now it's important to note, just using a 4x6 page setting is not going to give us a full bleed. The printer is kind of hardwired to just undersize the print a little bit to avoid getting ink on the liner. We can override that one setting. What's helpful is this borderless that's going to expand where we're printing the ink a little bit and help us get closer to the edge. But the other thing is we want to create a custom page size that's going to be full bleed and so what I'm going to do is create a new page. Here I'm going to call it 4x6 full bleed and I'm going to make this size 4.04 inches wide and 6.04 inches tall and I'm going to save that. And okay now what I'll see here in the preview is it did create that new size for us. And a kind of a nice feature that's in PDFs is the ability to not just print your file at the actual size but you can also use this fit so actual size prints at the actual size of the artwork fit is going to fit the artwork to the page size. Since we made that slightly larger size that's just going to blow this artwork up a little bit and fill in those areas. Some other things that we want to check in the properties here under the media tab are going to be the inter-label gap setting for the sensor that's just telling the sensor to look for the gap between the labels and start printing right at the top of the label. Another thing that we have to look at is pre-die-cut material is going to have about a sixteenth of an inch of liner exposed on the left and right margins and we need to adjust for that so that we can move that image over so it's not printing right on the edge of that liner but centering it on the label. And so what I'm going to do is I'm going to use this horizontal offset and I like to enter a value of minus 0.05, that's not quite a sixteenth of an inch. I don't want to move it a full sixteenth of an inch because then it's just going to over bleed too much on one side and not the other. I'm going to use a slightly less than a sixteenth of an inch to just center that image on the label left or right. For top to bottom, I'm going to use these settings over here, this is the top of form meaning the top of the label, I want to increase that to a plus .04 inches to print a little bit over the top of the label and then on the bottom of form or bottom of label, I'm going to decrease that value minus .06 inches and what this does is just opens up where I'm printing the ink and it's going to allow that ink to go over every edge left and right top and bottom of that label. Once I'm happy with this I'll hit OK. I'm going to enter a number of copies here and I'll send it down to the printer as a quick test to see how aligned or how well lined up we are. As I peel this back, looks like we have a pretty good set of values here and it looks like it's centered perfectly on the label. So now we're ready to send down our whole job and I'm using the pause button here on the printer so that I can set up the rewinder. Now this rewinder has a set of rollers, we're just going to go up and over up and under. There's a label on the side of this rewinder that shows the paper bath so you can always refer to that when you're setting this up to make sure you're threading it properly, and I'm using that pause button again to just pay out a little more material so I can set up. The rewinder have enough to attach to the core here. So we're going to go ahead and put our core on there and set it up and we'll take the labels to that core and once that all looks like it's in place, we'll go ahead and just turn on the rewinder and then we can unpause the printer and let it print. Now this is printing at 6 inch per second which gives us 1600x1600 dpi and that's going to be the top quality of the printer. As you can see, printing your own labels in-house is fast and easy with the L801, it's also affordable. If you're not already, you should consider making your own labels. Contact us through our website today at affinialabel.com to explore your requirements and determine which of our wide selection of label printers is right for your pricing and further information is available on our website as well.
Reviews
Write Your Own Review
Frequent Asked Questions
Submit a New Question
Hello!
Sign up for Exclusive Promotions and Industry News Trends
Success! You're now on the list. You'll start receiving Exclusive Email Offers shortly.